Purpose: The Users and System Security window is where user maintenance and system security
settings can be viewed, added, or edited. These settings affect the Association Manager (AM) system as a whole.
Note: Only a few people in the office should be given rights to Users and System Security. Changes to these settings can have a large impact on how users can use the system.
Launch Point: This routine can be launched from the following location(s):
•File → Users and System Security
•Utilities → Routines → Supervisor Functions → Users and System Security
Example: When the routine is launched a window will open
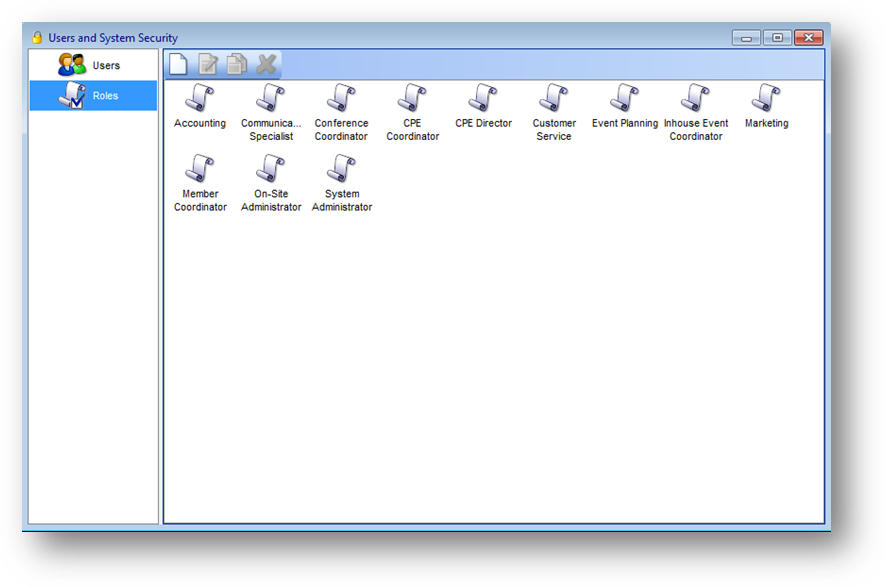
In the left side of the window there are listings for Users and Roles. Highlight Users to display users in the system in the right side of the window. Highlight Roles to see roles in the system in the right side of the window.
Roles can be setup in various ways but the suggested methodology is to set up roles for job descriptions. For example if in your association you have employees whose job is customer service and other employees whose job is member coordinator you would have a role “Customer Service” and a role “Member Coordinator”. The role would include permissions for the common tasks performed by all employees with that job description. Any unique functions that an employee performs can be handled using the additional permissions under that user. A user is not limited to being assigned to one role so if an employee does work found under multiple job descriptions than they would be assigned to multiple roles.
When Users is highlighted in the left side of the window you can add a new user, edit a user, copy a user, or delete a user. These actions can be done either by clicking the appropriate icon in the toolbar or right clicking on the user’s icon and selecting the appropriate option from the context menu.
Note: To edit, copy, or delete a user you must first highlight the user to work with in the right side of the window. If no user is highlighted then only add new user will be available.
Note: Delete a user will be disabled for the user currently logged in.
When you copy a user the role membership and additional permissions are copied to the new user.
The user window has three tabs: General, Member Of, and Effective Permissions.
The General tab will look different depending on if you are adding, copying, or editing a user. When adding or copying a user the fields are as follows.
Initials: Enter the three character initials to be used when logging into the system.
Password: Enter a password for this user. It must be a minimum of six characters.
Confirm Password: Re-enter the password.
Full Name: Enter the full name of the user. If you have a small number of users this can be just the first name.
Email Address: Enter the user’s email address. This email address is also displayed in User Preferences on the Email Options tab.
Manager: Select the user’s immediate manager. This field is not required (used in Voucher Request Maintenance routine).
A/P Approvers: Select the user’s that will be approving voucher requests added by this user. This field is not required (used in Voucher Request Maintenance routine).
When editing a user the initials are shown to the right of the user icon at the top. The fields are as follows.
Full Name: The full name of the user. If you have a small number of users you can use just the first name.
Email Address: The user’s email address. This email address is also displayed in User Preferences on the Email Options tab.
Manager: Select the user’s immediate manager. This field is not required (used in Voucher Request Maintenance routine).
A/P Approvers: Select the user’s that will be approving voucher requests added by this user. This field is not required (used in Voucher Request Maintenance routine).
Change Password button: To change a users password click the button to display additional fields.
New Password: Enter a new password for this user. It must be a minimum of six characters.
Confirm Password: Re-enter the new password.

The Member Of tab is broken into two grids. The Role Membership grid shows the role(s) that the user is assigned to. The Additional Permissions grid shows any additonal permissions that the user has in additon to permissions included in the role(s) assigned.
To edit the role(s) the user is assigned to click on the Edit Roles link text on the right above the Role Membership grid. This will open the Select Role(s) window.
A list of the available roles in the system are displayed. Roles which the user is already assigned will be checked. To add or remove the user from a role check or uncheck the role listing accordingly.
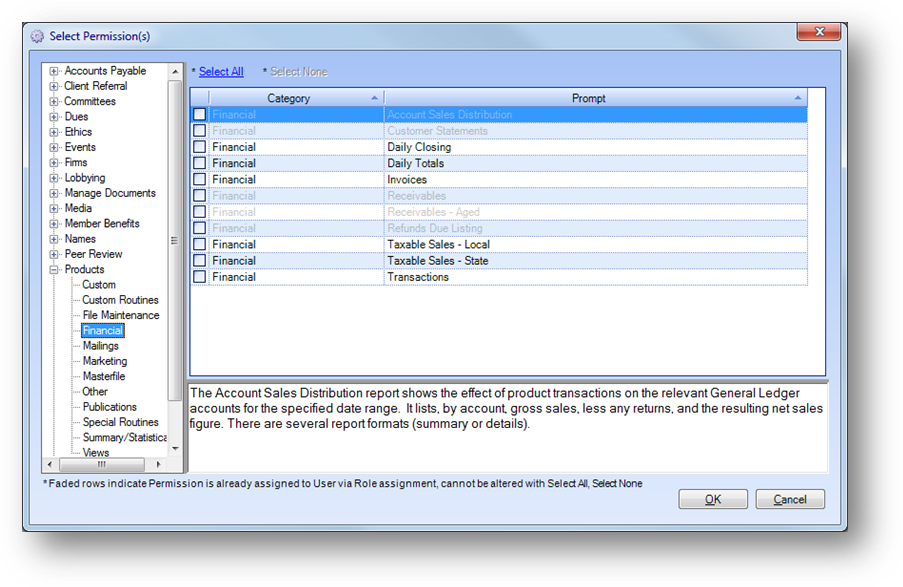
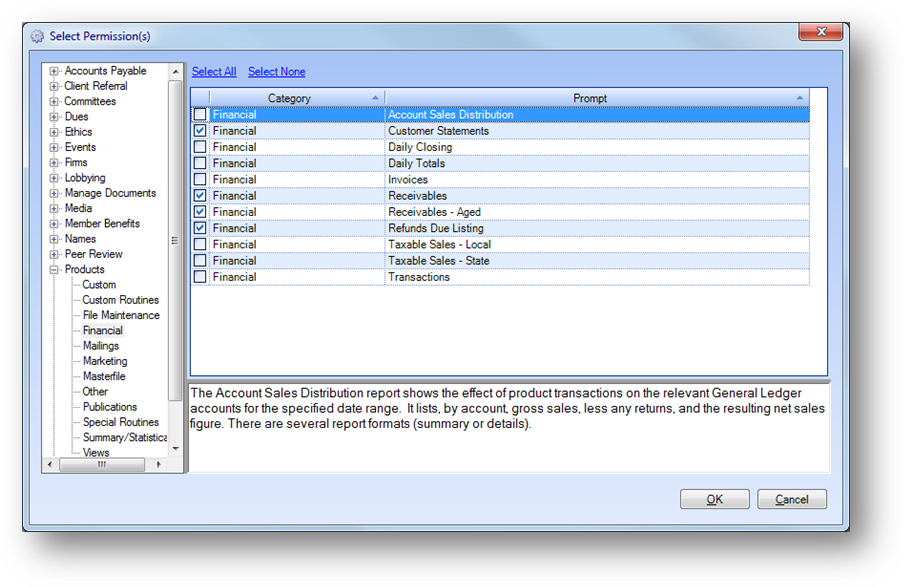
To edit the additional permissions the user is assigned to click on the Edit Permissions link text on the right above the Additional Permissions grid. This will open the Select Permission(s) window.
A list of the available permissions in the system are displayed. Permissions which the user is assigned to via a role assignment are fadded in the grid. Any permissions already assigned via additional permissions will be checked. To add or remove additional permissions for the user check or uncheck the permission listing accordingly.
To see all of the available permission listings for a particular module click on the desired module on the left of the window. To filter the display, click on the plus sign to the left of the module to expand the category listings for that module. Highlight one of the categories on the left to see only the related permissions in the upper right pane.
The Select All and Select None links above the grid can be used to check or uncheck all permissions currently displayed in the grid.
Note: A fadded row indicates the permission is assigned via a role assignment and cannot be altered from this screen.
To see a description for the permission in the lower right pane highlight the specific permission in the upper right pane.
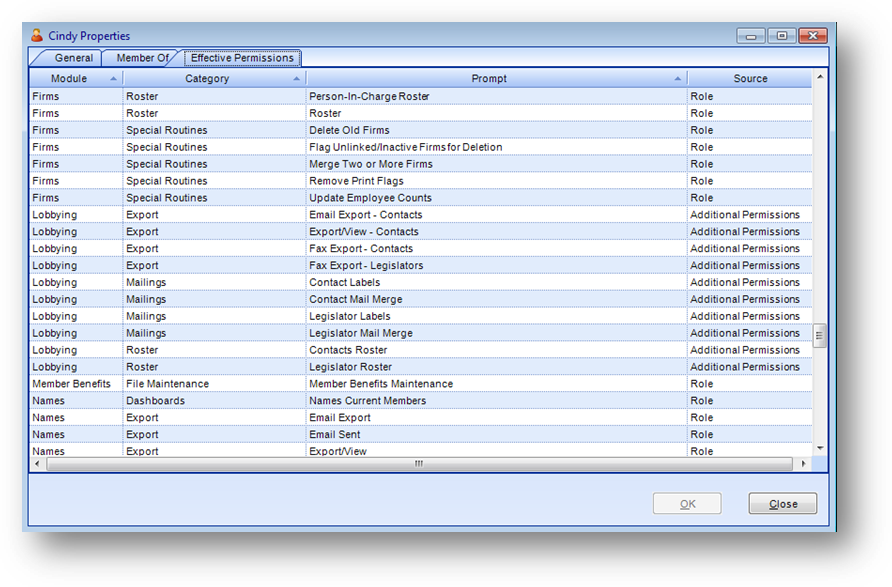
The Effective Permissions tab shows all permissions granted to the user. The Source column in the gird shows if the permission was assigned from a role assignment or from additional permissions.

With Roles highlighted you can add a new role, edit a role, copy a role, or delete a role. These actions can be done either by clicking the appropriate icon in the toolbar or right clicking on the role icon and selecting the appropriate option from the context menu.
Note: To edit, copy, or delete a role you must first highlight the role to work with in the right side of the window. If no role is highlighted then only add new role will be available.
When you copy a role the permissions on the Activities tab are copied to the new role.

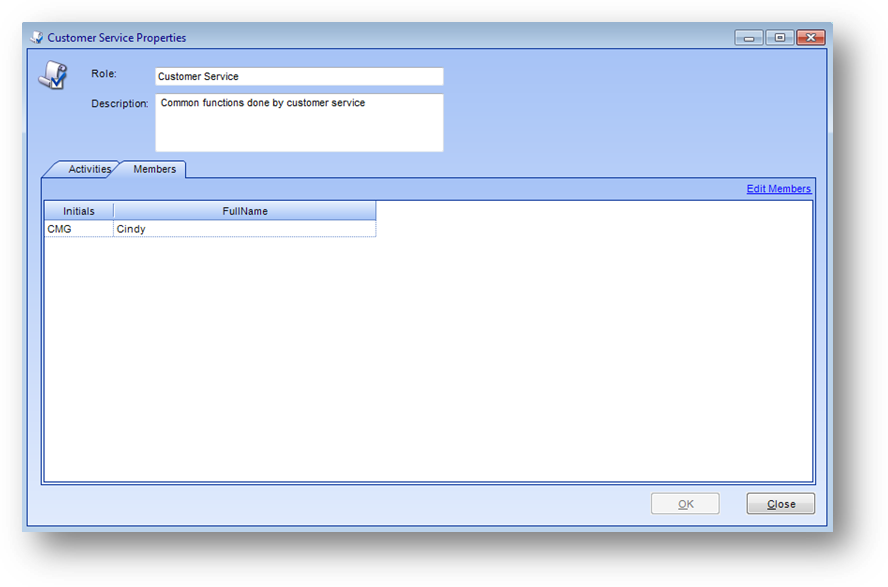
The role window has two tabs: Activities and Members. The fields on the Activities tab are as follows.
Role: The name of the role.
Description: A general description of the permissions covered in the role.
The grid on the Activities tab shows the permissions that are assigned to the role.

To edit the permissions assigned to the role click on the Edit Permissions link text on the right above the grid. This will open the Select Permission(s) window.
A list of the available permissions in the system are displayed. Permissions assigned to the role will be checked. To add or remove permissions for the role check or uncheck the permission listing accordingly.
To see all of the available permission listings for a particular module click on the desired module on the left of the window. To filter the display, click on the plus sign to the left of the module to expand the category listings for that module. Highlight one of the categories on the left to see only the related permissions in the upper right pane.
The Select All and Select None links above the grid can be used to check or uncheck all permissions currently displayed in the grid.
To see a description for the permission in the lower right pane highlight the specific permission in the upper right pane.

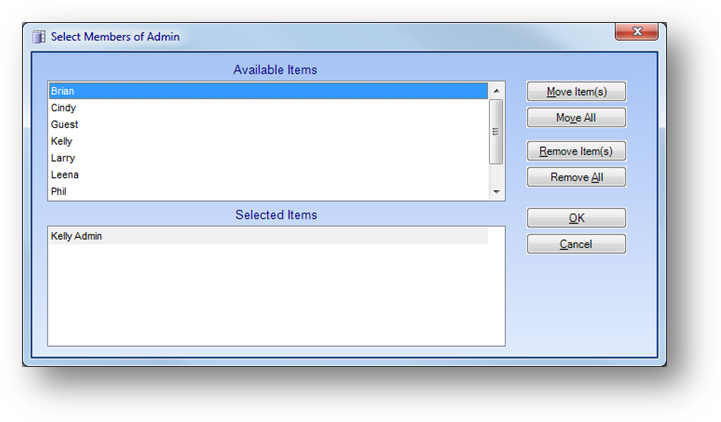
The Members tab shows all users assigned to the role. To edit the users assigned to the role click on the Edit Members link text on the right above the grid. This will open the Select Members of window.

Move users from the Available Items list to the Selected Items list to assign them to the role. To remove a user from the role, move the user from the Selected Items list to the Available Items list.
Watch the Users and System Security video: